- Preparation time
- 60 mins
- Cooking time
- 50 mins
- Difficulty
- easy
- Serves
- 16 people
- Meal course
- Dessert
- Posted by
- Posted on
- November 29, 2015
- 375 Grams
- Plain flour
- 419 Grams
- caster sugar
- 110 Grams
- cocoa powder
- 15 Grams
- baking soda (bi-carb soda)
- 8 Grams
- Salt
- 500 Grams
- soymilk
- 20 Grams
- Vanilla extract
- 15 Grams
- white wine vinegar
- 115 Grams
- sunflower oil
- 205 Grams
- soymilk
- 300 Grams
- dark chocolate
- 100 Grams
- vegan margarine
- 20 Grams
- Vaniila extract
- 200 Grams
- extra dark and white vegan chocolate if you want to make chards.
- 340 Grams
- Raspberry jam
- 200 Grams
- Fresh berries to decorate.
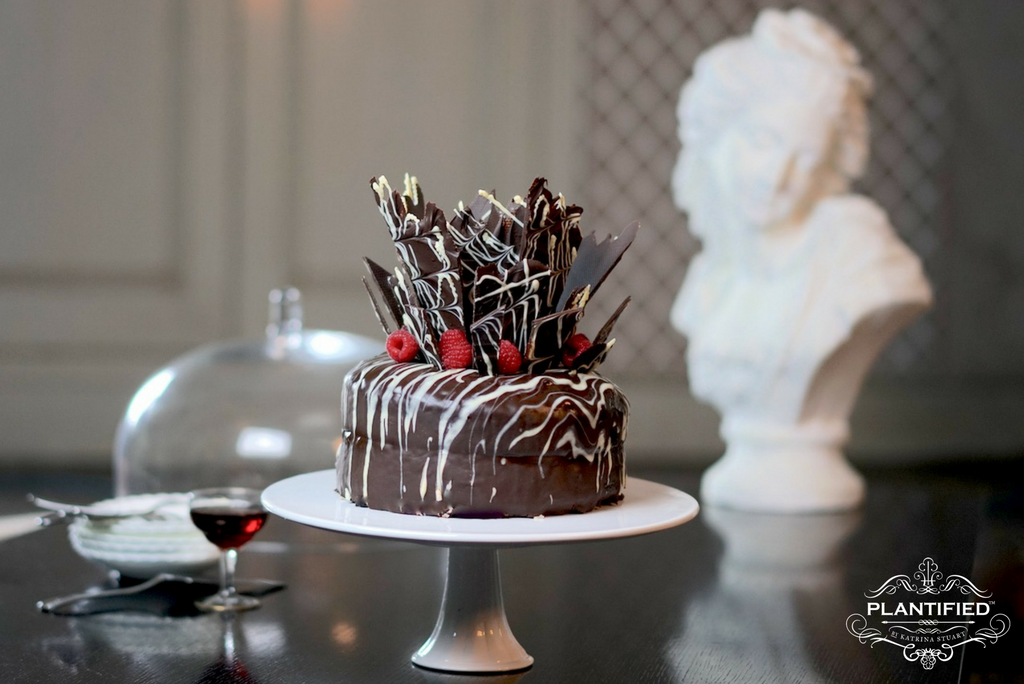
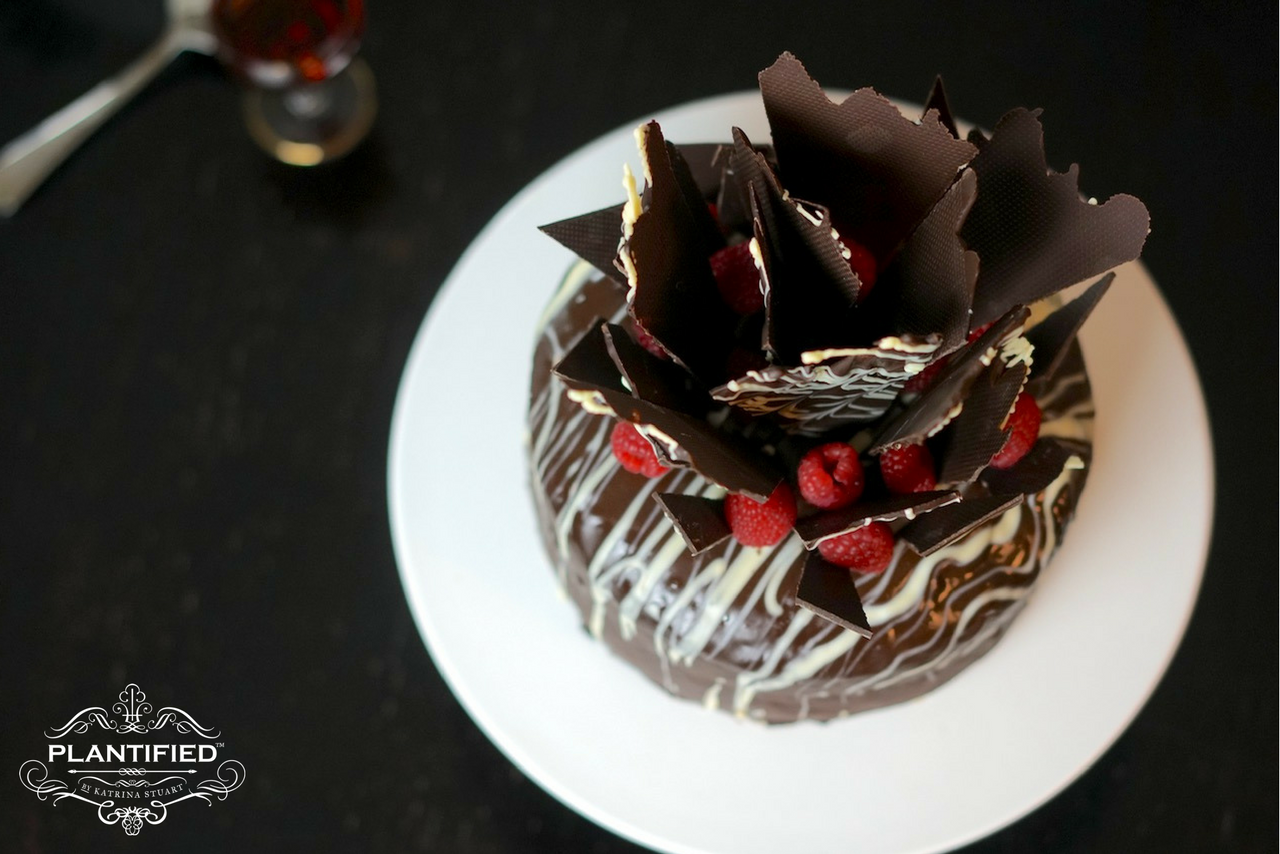
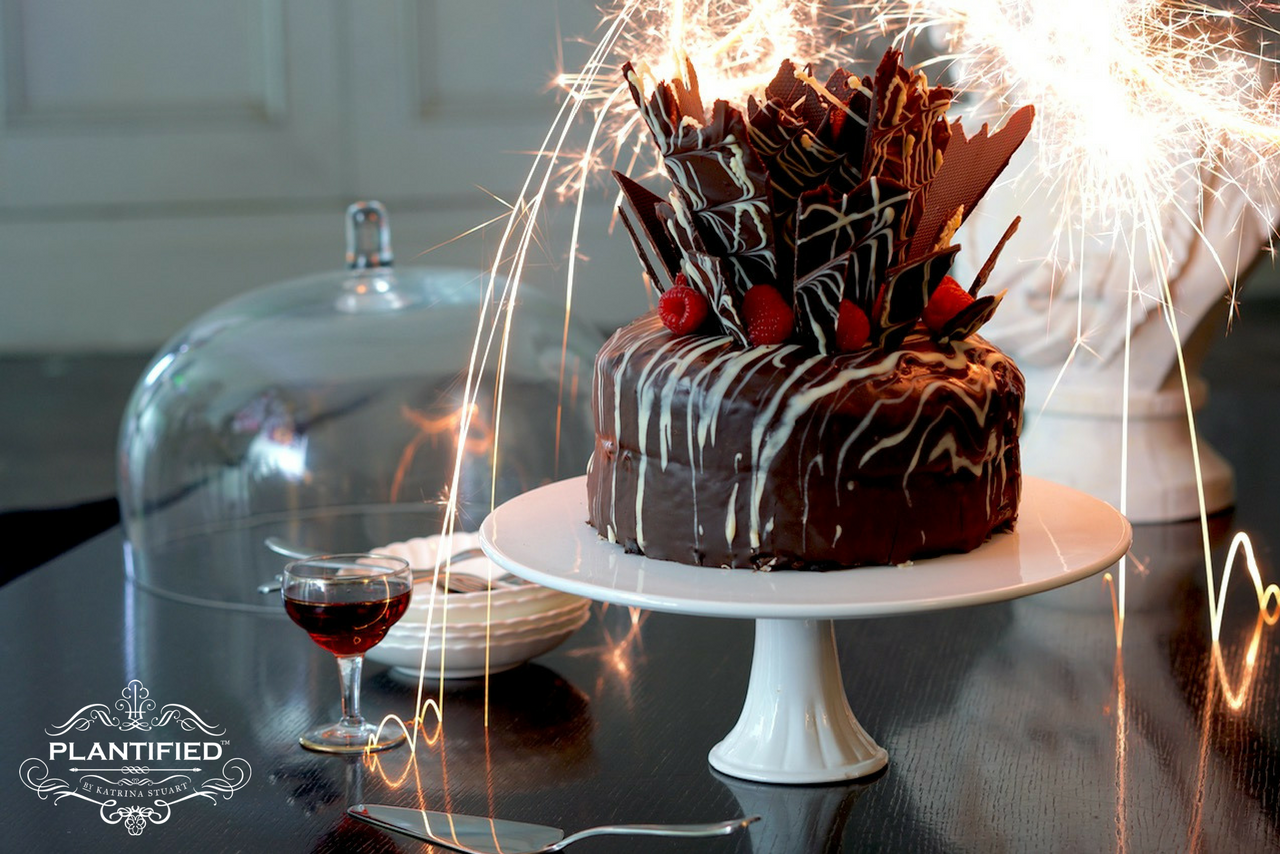
This Raspberry Blackout cake can be made to look as simple as you want, or you can turn it into a showstopper for a birthday party or event!
The cake is a rich, dark colour inside with a moist feel to the crumb, and best of all, the cake is incredibly easy to make!
It is filled with a Raspberry jam which sinks into the cake when warm, and then layered with a chocolate ganache!
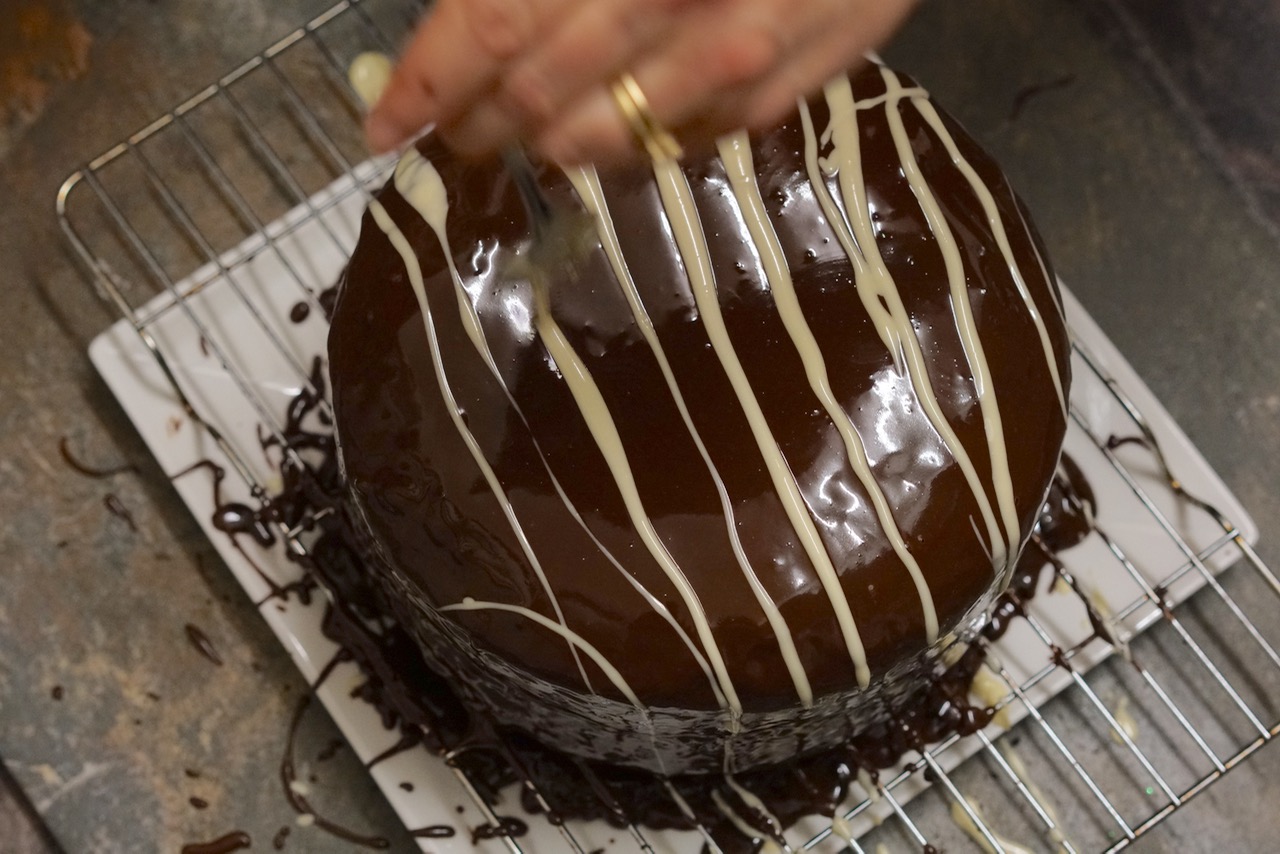
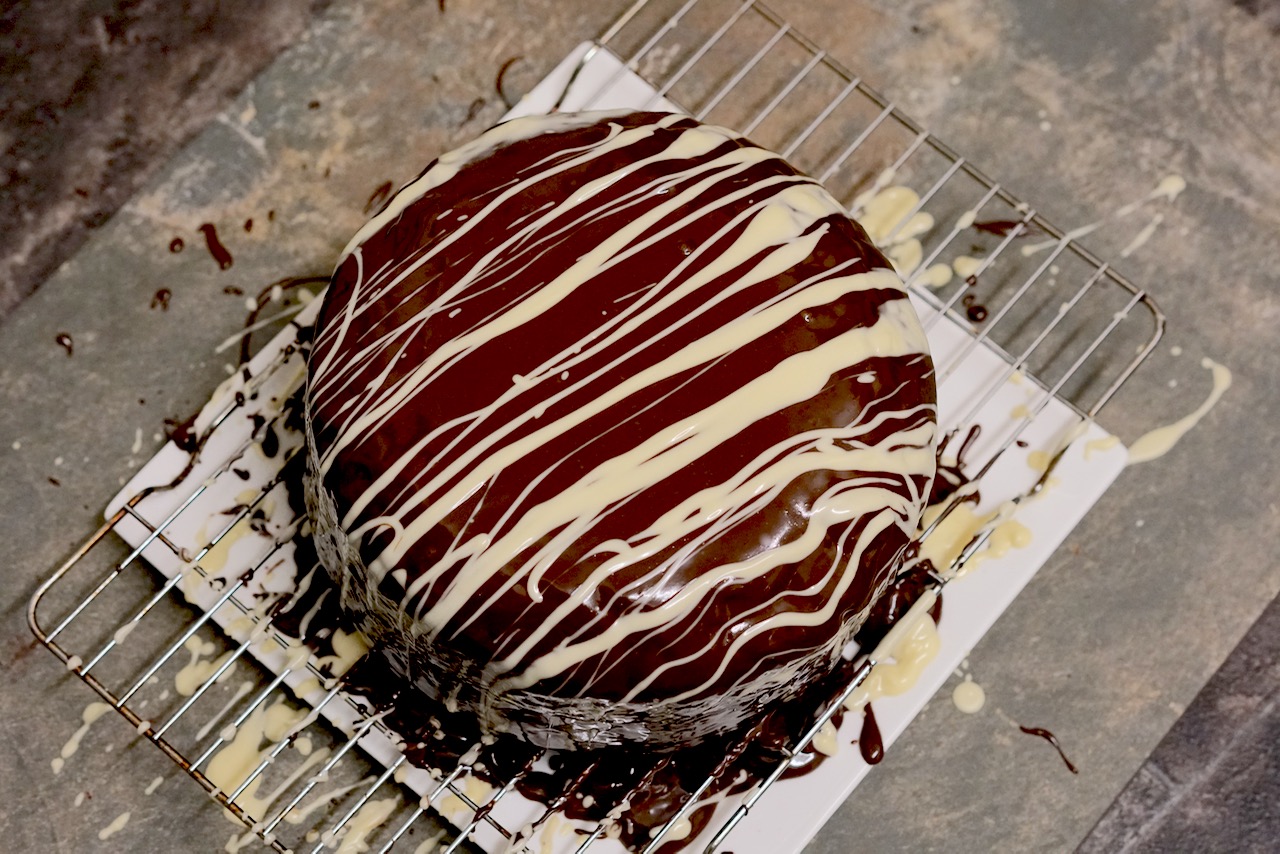
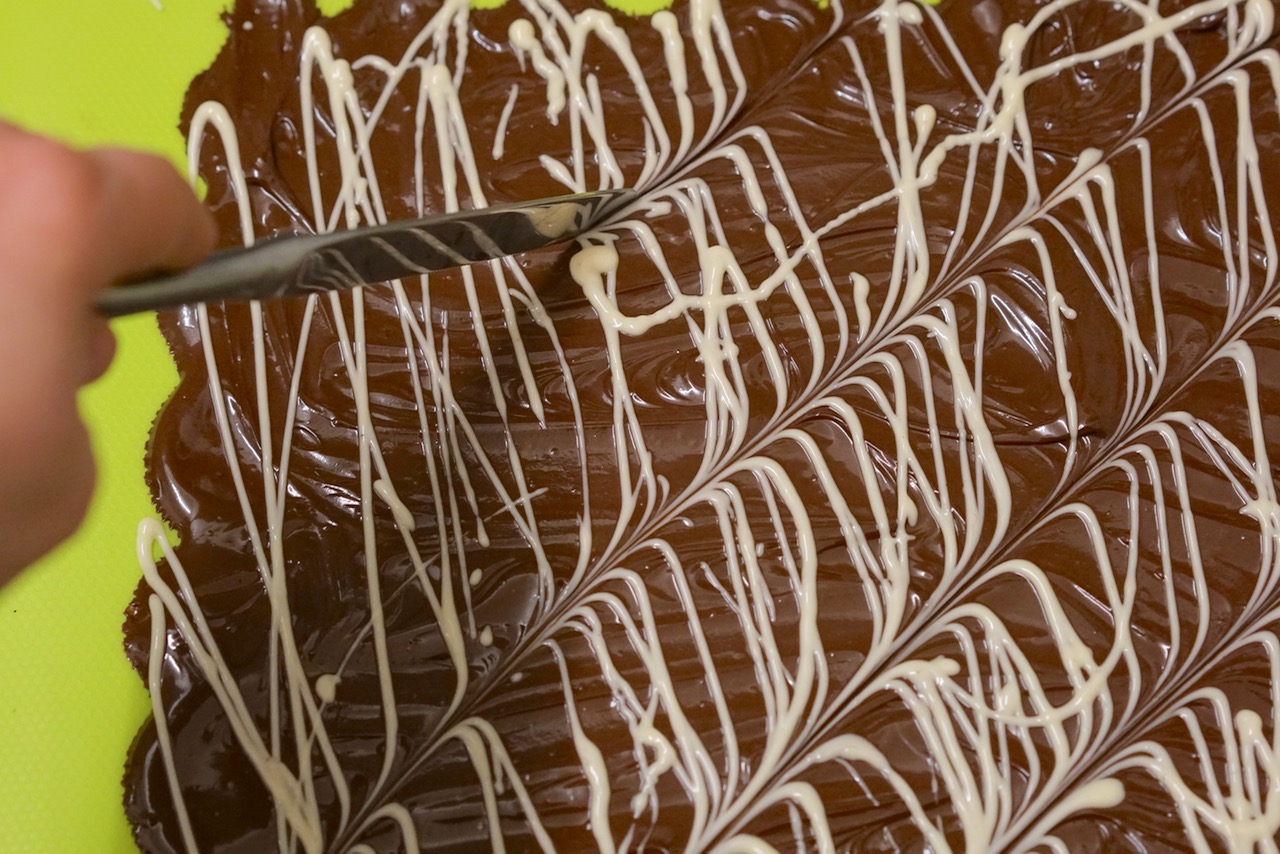
To dress the cake, it is covered in a chocolate ganache, and can be decorated numerous ways, from a simple ganache poured over, with a pile of fresh berries in the centre, to a white vegan chocolate detail which i did here by piping over white chocolate whist the ganache was warm and dragging patterns through with a knife.

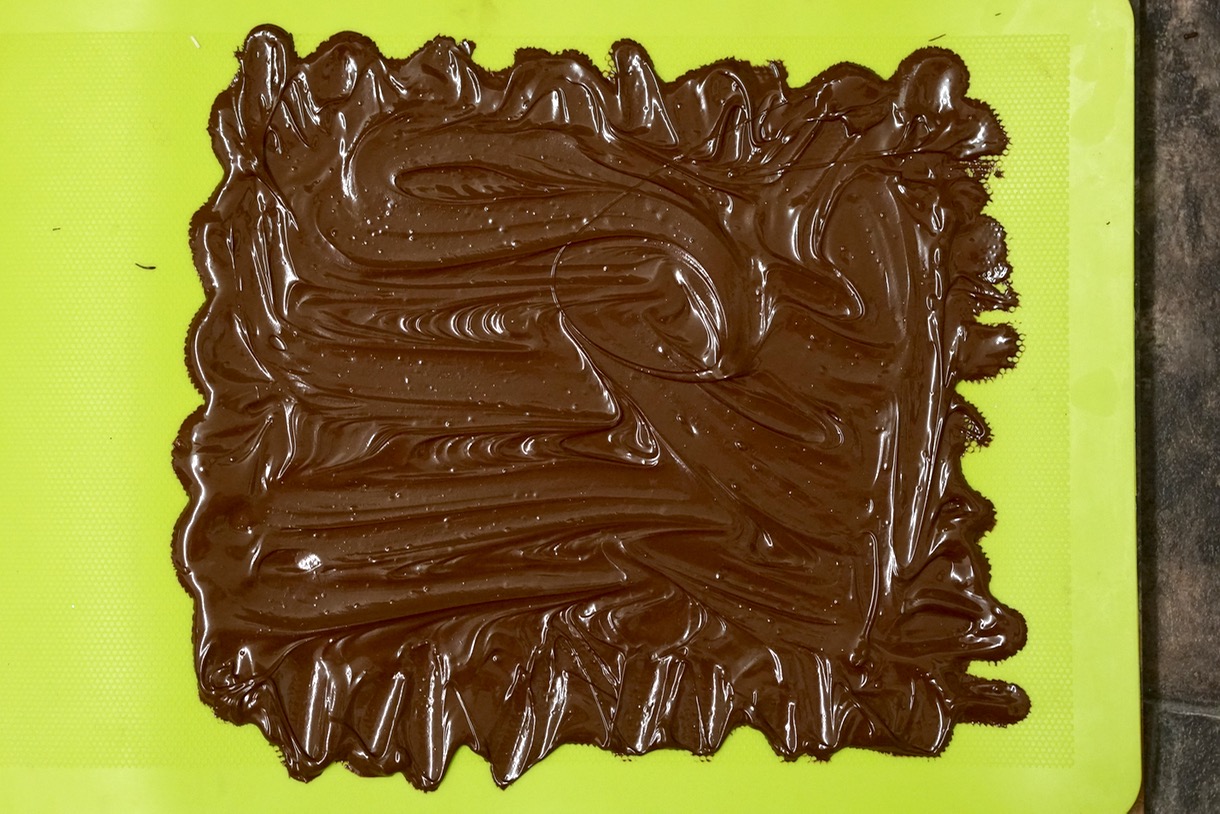
The chocolate chards were made by spreading melted chocolate on a silicone sheet into a long rectangle shape (or non stick parchment paper) and piping over white chocolate again and dragging through whilst still melted.
Once the chocolate is starting to firm up, score your shapes so it will snap easily once set ,to make the chards.
What is a little embarrassing is that it seems I was enough of a doofus not to have the flashcard in the camera when I photographed the rectangle shape to make the chards, so we will have to make do with these square pics and pretend they are a rectangle ok 🙂
Making a square leaves you with really long chards…Making a rectangle to cut up gives you shorter chards you can cut on an angle to give an angled top!
So go for a rectangle!
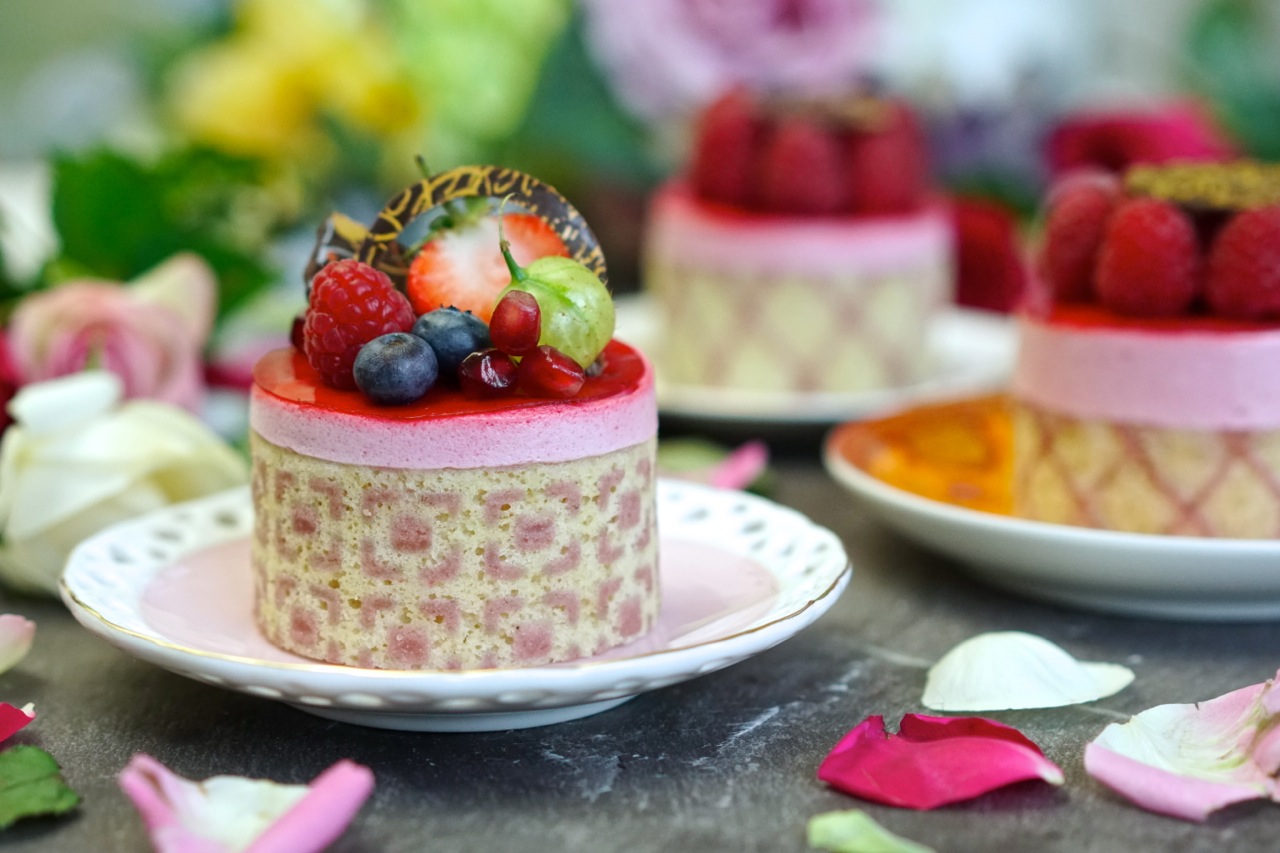
My Plantified Mousses Recipe book is on it’s way to being finished, and you will receive an email letting you know when your FREE copy of the E-book is ready to download!
If you would like a FREE COPY OF THE RECIPE E-BOOK, and haven’t yet signed up to Plantified, please sign up here:http://plantified.com/register/ and you will receive your FREE recipe book once it is released.
Raspberry Mousse Imprime Entremet, as seen in the Free Mousse E-book for members of Plantified.
Enjoy
x
Katrina Stuart
Please come and join our FACEBOOK GROUP https://www.facebook.com/groups/Plantified/ and post some of your favourite recipes, ask some questions, show off a dish you’ve cooked or just have a chat!
Raspberry Blackout Cake
I use two spring form pans approx 8 1/2 inch / 21 cm Dia each for this recipe.
Ingredients:
For cake :
375 grams Plain flour
420 grams Caster Sugar (Super fine)
110 grams Cocoa Powder
15 grams Bi-carbonate Soda (Baking soda)
8.8 grams Salt
500 grams Soy Milk
20 grams Vanilla Extract
115 grams Sunflower Oil
15 grams White Wine vinegar
For chocolate ganache:
205 grams Soy Milk
300gm Dark Chocolate
100 grams Vegan Margarine
20 grams Vanilla Extract
15 ml Scotch Whiskey (Optional)
Jam filling:
340 grams Raspberry Jam
Decoration:
200 grams Fresh Raspberries
200 grams Dark Chocolate to make chards
140 grams Vegan white chocolate for extra details
( OR you could use chocolate transfer sheets to make decorative chards (****make sure to check the ingredients, as some are just cocoa butter and food colouring, and others that look exactly the same from a different supplier can contain whey powder etc!!!!)
Method:
-Pre heat the oven to 180c (350f)
-Measure out 375 grams Plain flour, 420 grams caster sugar , 110 grams cocoa powder, 15 grams baking soda (bi-carb soda) and 8.8 grams salt and mix together.
-In a separate vessel, measure out the wet ingredients, ( 500 grams soymilk, 15 grams vinegar, 115 grams sunflower oil and 20 grams vanilla extract) and mix together. The soymilk will curdle, but this is normal, and what is expected.
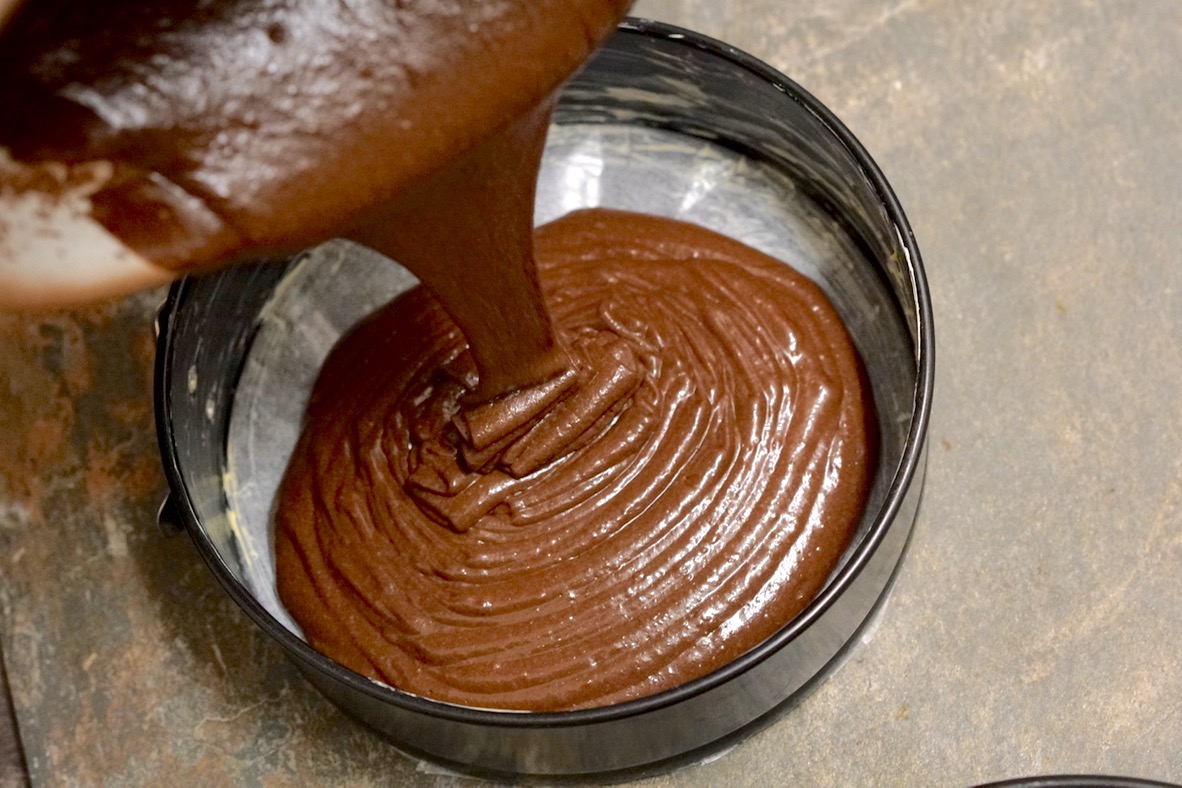
-Mix the dry and wet ingredients together and blend thoroughly.
-Line 2 springform pans with nonstick parchment paper, and grease the sides and then spread the cake batter into the pans and place into the oven at 180c ( 350 f ). Depending on your oven it will take between 40 -50 mins to bake, but keep an eye on it and remove it AS SOON as a skewer comes out of the cake clean, to avoid the cake drying out.
-Set aside to cool slightly.
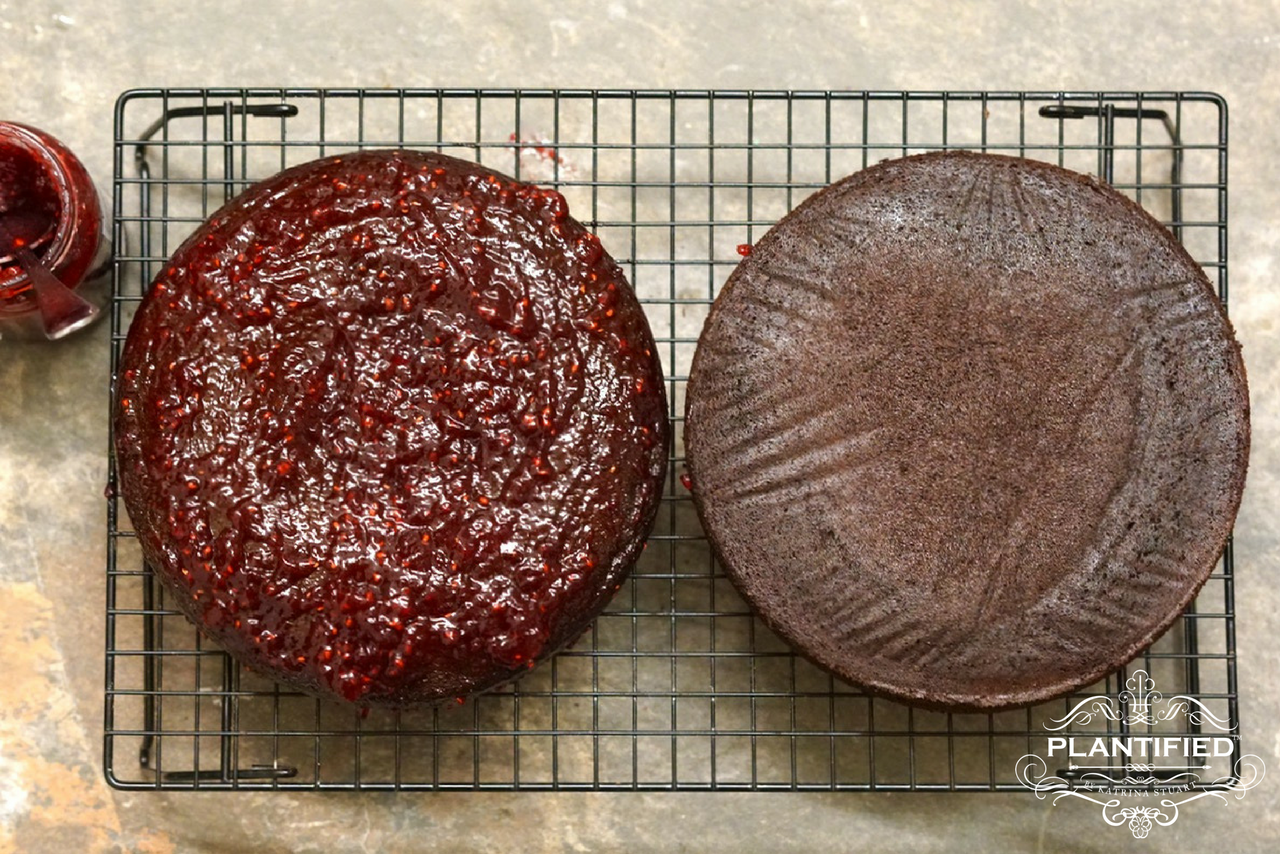
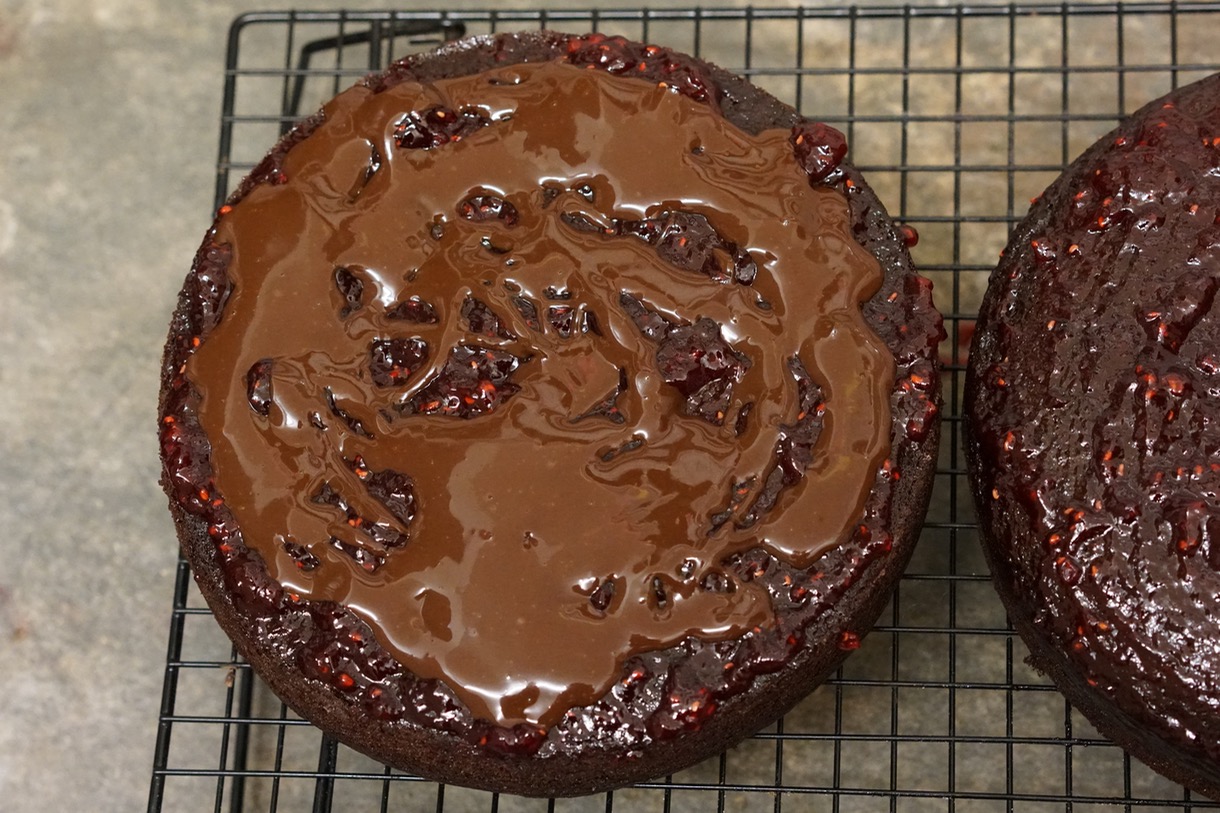
-Whilst still a bit warm,spread the raspberry Jam over the middle and the top layer and set aside to cool.
The jam will sink in as it cools.
The jam under the ganache on the top layer adds a really nice flavour!
-Chocolate ganache:
In a saucepan, heat up 205 grams soymilk until it is almost brought to the boil then turn off.
-Add 300gms dark chocolate, broken into pieces, and 100 grams margarine and 20 grams vanilla extract and stir until it melts and is well blended and set aside to cool.If you want to add Whiskey or another Liqueur that compliments the flavours, mix it in now.
-The ganache will be runny when hot and at the ideal temp will be pourable but thicker.
If you leave it TOO long however, it will set in the saucepan (but nice to eat with a spoon 🙂 )
-Once the ganache is cooled to the right point drizzle some over the middle layer of the cake and then stick the layers together, and place in the fridge to cool. The layers will slide if you try to dress it all at once!
-Once the cake is cool and the ganache firm, take it out of the fridge to decorate with the remaining ganache. If the gananche has firmed up too much at this point to be pourable and give a smooth finish, you will need to slightly warm it up again until you get it back to a nice thick ,pourable consistency.
-To dress the cake, You can either pour it over the top and let it run down the sides for a more rustic look , or completely cover the cake as I did and add a white vegan chocolate detail which I did here by piping over white chocolate whilst the ganache was warm and dragging patterns through with a knife. Tip : Add 1 teaspoon of vegetable oil to the white chocolate when you melt it, to make it more pliable on the Ganache so it doesn’t crack when cutting!
-Place into the fridge to chill completely, so the ganache can set.
-The chocolate chards were made by spreading melted chocolate on a silicone sheet (or non stick parchment paper) and piping over white chocolate again and dragging through whilst still melted. Once the chocolate is starting to firm up, score your shapes so it will snap easily once set , to use as chards.
-Melt the chocolate, and spread it out in a long rectangle shape. (Not Square like shown in the pics above- my pics of the proper shape mysteriously disappeared off my flashcard! (Actually I think I was an idiot and didn’t have the flashcard in the camera but that’s our secret ok! – shhh!!!)
Use your spoon to feather the edges to make a wavy look, and then pipe white chocolate over in lines or a pattern of your choice.
I used a small Wiltons tip, no2 so that it came out in a fine line, then I used a skewer to carefully and gently drag the lines through, without cutting down into the chocolate.
-Place the Chocolate sheet into the fridge to set, then use a hot knife to press down and cut your wedges.
-Dress the cake just before serving.
Stab the chards into the middle in an artistic way, and then arrange your raspberries including dropping the odd one amongst the chards.
The easiest way to get the cornet effect on the cake pictures, is to use 4 of the largest pieces and start in the centre on the cake, then work your way outwards.
I used small pieces of shard around the outside to kind of “lock” the Raspberries in place so that they stay in place during transport.
Even add a few Sparklers when presenting the cake for a bit of extra bling!
Enjoy! 🙂
- Pre heat the oven to 180c (350f)
- Measure out 375 grams Plain flour, 420 grams caster sugar , 110 grams cocoa powder, 15 grams baking soda (bi-carb soda) and 8.8 grams salt and mix together.
- In a separate vessel, measure out the wet ingredients, ( 500 grams soymilk, 15 grams vinegar, 115 grams sunflower oil and 20 grams vanilla extract) and mix together. The soymilk will curdle, but this is normal, and what is expected.
- Mix the dry and wet ingredients together and blend thoroughly.
- Line 2 springform pans with nonstick parchment paper, and grease the sides and then spread the cake batter into the pans and place into the oven at 180c ( 350 f ). Depending on your oven it will take between 40-50 mins to bake, but keep an eye on it and remove it AS SOON as a skewer comes out of the cake clean, to avoid the cake drying out.
- Set aside to cool slightly.
- Whilst still a bit warm,spread the raspberry Jam over the middle and the top layer and set aside to cool. The jam will sink in as it cools. The jam under the ganache on the top layer adds a really nice flavour!
- Chocolate ganache: In a saucepan, heat up 205 grams soymilk until it is almost brought to the boil then turn off.
- Add 300gms dark chocolate, broken into pieces, and 100 grams margarine and 20 grams vanilla extract and stir until it melts and is well blended and set aside to cool.
- The ganache will be runny when hot and at the ideal temp will be pourable but thicker. If you leave it TOO long however, it will set in the saucepan (but nice to eat with a spoon :) )
- Once the ganache is cooled to the right point drizzle some over the middle layer of the cake and then stick the layers together, and place in the fridge to cool. The layers will slide if you try to dress it all at once!
- Once the cake is cool and the ganache firm, take it out of the fridge to decorate with the remaining ganache. If the gananche has firmed up too much at this point to be pourable and give a smooth finish, you will need to slightly warm it up again until you get it back to a nice thick ,pourable consistency.
- To dress the cake, You can either pour it over the top and let it run down the sides for a more rustic look , or completely cover the cake as i did and add a white vegan chocolate detail which i did here by piping over white chocolate whilst the ganache was warm and dragging patterns through with a knife.
- Place into the fridge to chill completely, so the ganache can set.
- The chocolate chards were made by spreading melted chocolate on a silicone sheet (or non stick parchment paper) and piping over white chocolate again and dragging through whilst still melted. Once the chocolate is starting to firm up, score your shapes so it will snap easily once set , to use as chards. Chocolate chards can be made by melting dark chocolate and spreading it out over a silicon sheet or baking paper. Place the chocolate in the fridge to set.
- Place the Chocolate sheet into the fridge to set, then use a hot knife to press down and cut your wedges.
- Dress the cake just before serving. Stab the chards into the middle in an artistic way, and then arrange your raspberries including dropping the odd one amongst the chards. The easiest way to get the cornet effect on the cake pictures, is to use 4 of the largest pieces and start in the centre on the cake, then work your way outwards. I used small pieces of shard around the outside to kind of "lock" the Raspberries in place so that they stay in place during transport. Enjoy! :)
6 comments-

jacquisturm said on December 6, 2015
Wow, that looks so beautiful!
-

gymmonkey said on December 28, 2015
Looks yummy
😋
-

Veroni said on January 23, 2016
Looks great. Very similar to a recipe I often make. I'm wondering though, should the margarine be melted? How do you mix all the wet ingredients, including the margarine? I'm confused about what are your wet ingredients in this method? What do you mean by "Chocolate ganache: soymilk"? Maybe you've missed out an extra soymilk in your ingredients list?
-

katrinastuart said on January 23, 2016
Hi Veroni
The ingredients are split up into cake ingredients, and then chocolate ganache ingredients, which are listed after the title Chocolate ganache: of which soymilk is the first ingredient.
Re-reading it, I see how it could be a bit confusing so i will just go back and re-edit to clarify, and hopefully it makes more sense then!
-

katrinastuart said on January 23, 2016
Hmmm, The extra ingredients have disappeared from the recipe list when I have edited in the front end instead of the back end of the site- not sure why this is happening, but it has happened on a few other earlier on.
I'm making the changes now in the back end of the site.
Sorry about that.
-

katrinastuart said on January 23, 2016
Right, that should be fine now.
I have also added the ingredients list into the main description, as I find that easier to follow myself.
After updating and constantly losing ingredients on the list along with some of my hair I was tearing out in frustration, I believe it is all there now!