
Introducing the gorgeous Araminta Mae, my daughter, who is demonstrating in the latest Plantified video how to make yourself this great Classic Crusty White Cob!
Great for dipping in soup or slathered with peanut butter and jam, this easy white bloomer is a light loaf with a wonderful texture, a soft crumb and a great crust.
If you’ve never made bread before, this is the perfect starting point. If you follow the recipe EXACTLY, you can’t go wrong. Trust the recipe!
It is so easy, even my Daughter Minty, could make it all on her own, and she’ll show you how, in the above video!
When you bake it and your friends are impressed and ask, “wow, do you have a bread machine?” simply reply, “I am the bread machine!”
If you want to learn how to create a video like this for your own content, watch Rocketland Medias’ tutorial video, with Jonas Stuart, showing you exactly how to put together a professional video like this for yourself, simply and easily!
Some of you might know from being in the Plantified Group that I have been out of action, sick in bed for the last few months with horrendous morning sickness!
I am 17 weeks pregnant, so will be looking a little rounder when you see the next you tube video! 🙂
All is going well, and now I am back on my feet, things will get going again, so if you have wondered why I fell off the face of the earth- there’s the reason!
I am off to Italy on the 9th of May for two weeks, visiting Verona and then Portofino, so watch out on the you tube channel for some Videos shot on location in Italy coming up, with some delicious Italian Inspired food!
One of my favourite restaurants in the UK, is Antonio Carlucci’s “Carluccio’s” restaurant!
After going the other night to celebrate finding out what Sex baby is one their way, I was inspired to recreate some of my favourite dishes they offer there that are Plantifiable, so watch out for some delicious Antipasto dishes and tasty Pasta dishes , along with sharing some amazing sights of Italy with you!
I can’t wait!
Sign up to Plantified TV youtube !
Please come and join us, if you haven’t already, in our Plantified FACEBOOK GROUP and post some of your favourite recipes, ask some questions, show off a dish you’ve cooked or just have a chat!
This recipe uses a 1kg Bamboo Banneton to prove the bread in which gives it it’s wonderful shape!
You can buy this one here on Amazon UK: Eddingtons Traditional Round Banneton (25 x 8.5cm)
Or this on Amazon.com: http://amzn.to/2b8TXYT
Raspberry Mousse Imprime Entremet, as seen in the Free Mousse E-book for members of Plantified.

Featured in the Plantified Mousses E-book .
If you would like a FREE COPY ,sign up to www.plantified.com
Enjoy
x
Katrina

Classic Crusty White Cob
Ingredients:
- 500g strong white flour
- 7g salt
- 7g fast action dried yeast
- 35g olive oil
- 325g water
- Extra flour for kneading
Method:
- -Place all ingredients in the bowl except for the water. Keep the salt and the yeast at opposite ends of the bowl so they don’t mix (the salt will kill some of the yeast otherwise!)
- -Add most of the water stirring as you go.
You want a soft (not flaky or dense) dough and it may not take all the water to get this. It’ll be a bit sticky but not too wet to knead. Although it’s always easier to add a little more flour that it is to add a little more water. If you add the last of the water bit by bit you should get it right without having to add extra of either. - -Once combined and the consistency is good, you’re ready to knead the dough.
Time to get your hands dirty!
Lightly dust the bench-top with a little extra flour.
There’s not really any right or wrong technique for kneading. Kneading is about elongating the gluten bonds.
This takes time. Don’t rush it! Definitely minimum 10 minutes. - -Fold it over, push the heal of your hand into it. Roll it over and repeat.
(I might add some pictures if anyone thinks they might get stuck – just comment below and I’ll photograph the kneading process). - -Place the dough back into the bowl and cover with lightly oiled cling film. Leave somewhere warm (by warm I mean warmish room temperature, not the boiler cupboard!). Allow to proof for 60-90mins or until it’s doubled in size.
- -Scrape the dough back onto the bench and knock back (this means knock the air out of it). It’s not really about kneading it any further now, it’s more about shaping it. If you shape it into a ball then make it rotate by flattening your hands, palm facing up, and gradually bring them together underneath the ball of dough. If you do this repeatedly it will make the ball more perfect and it’ll give it a kind of belly-button at the bottom.
- -When this is done, place it gently into your 1 kg Banneton basket (I used one of those modern, Bamboo ones for this loaf). Cover again with oiled cling film and allow to rise again ’til doubled. Should be 50-65 minutes this time but keep an eye on it. If it over proofs it’ll collapse as the gluten bonds will over develop.
- -About half way through this second proof, turn the oven on to 200°C with a metal oven tray in the bottom of the oven.
- -When the loaf has risen, remove the cling film, lightly dust the bottom of the loaf and put an upside down baking sheet on top of the Banneton. Gently turn it over and remove the Banneton.
- -Gently place the tray in the oven and pour half a cup of tap water in the tray. Close the door quickly – but gently! Being gently at this stage keeps the air in your loaf allowing it to stay light as a pillow when baked. It will rise further in the oven.
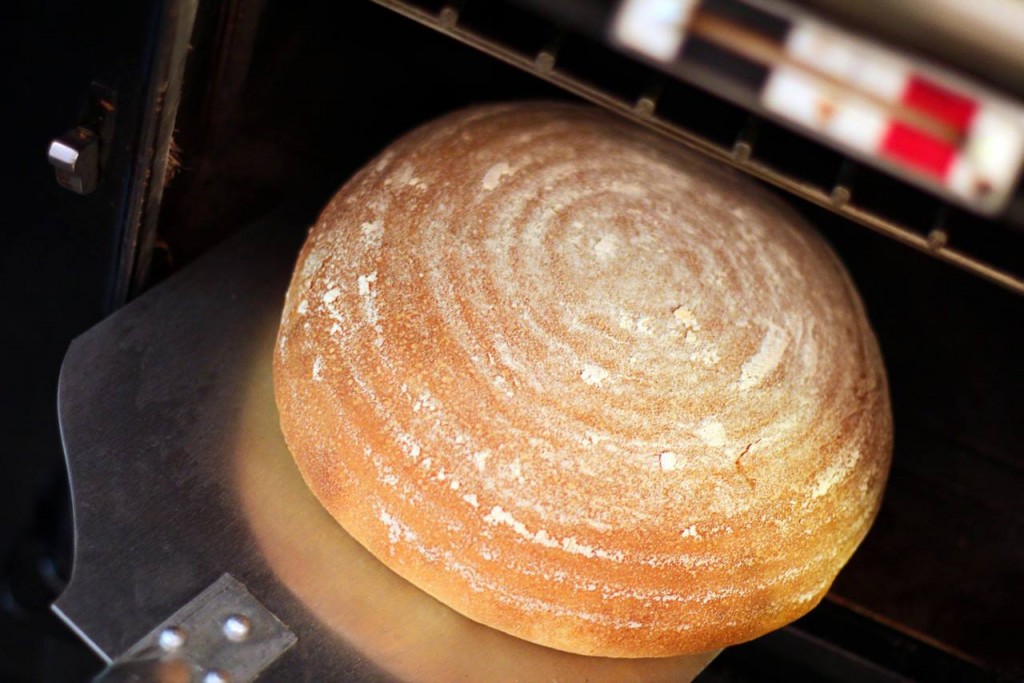
- -Bake for 30 mins before removing the tray and finishing the bake directly on the oven shelf reducing the temperature to 180°C for a further 15-20 mins. This will depend on your oven so pay attention the first time you bake this. You need to turn it down once it looks nicely browned (like my picture here!) It won’t brown much more once you turn the oven down, it’ll just improve the crust and make sure the loaf is fully baked (as it’s quite a large loaf).
- -When you take the loaf out of the oven check that it’s baked by turning it upside down with a clean tea towel and knocking on the bottom. It should sound woody, not dull.
- -Set it aside on a cooling rack until it is only just warm. Then eat it fresh with soup or peanut butter and jam º¬)
3 comments-

Maraika said on April 28, 2017
Great video. Great loaf. Well done Minty :)
-

katrinastuart said on April 28, 2017
Thanks Maraika!
She'll be chuffed when I tell her you said that!
-

Johanne said on April 29, 2017
This video is a charmer. I love the casual way she treats the dough, like she has been working in a bakery for 20 years.
The scenery is so verdant. Good to know you live on such beautiful land. Jonas did great with the editing.